Friday 12 October 2012

Lately..

I have been slack, plain and simple. Well, I have been with blogging anyway. 

My craft on the other hand has been amazing! 

I have been customising wondersuits
Making pretty dresses from etsy patterns


Pretty dresses from sewing books


Refashioning clothes - 


And just generally trying to be crafty! My kids are loving the new additions to their wardrobes and can't wait for more!


Friday 22 June 2012

Tangerine Tip Toes


These shoes are AMAZING. And they only cost me $5!

When my sister came to stay for a while, I wanted to make something special and cool for her to show off to her friends. So we came up with these. Pretty neat huh?!

They are so simple to do. If you know how to use RIT dye then you are already have the knowledge to make your own pair. 
If not then keep reading after the jump to learn how!

Thursday 21 June 2012

Custom Canvas Creations

This amazing woman in the 2 pictures below (trying to tempt my baby girl into having a beer), is my beloved Nan Gay (as in Gabrielle). Kind, sweet, caring and Oh so funny. 


My Nan passed away in October last year, rather suddenly. This has been very hard for my family as we are all very close. 

Now the lady in the photo below is my Nans life partner, Lyn. She is also amazing, kind and I am proud to also call her my Nan Pooh (as in Pooh Bear). 


As a child I remember my Nan Gay always singing and whistling the tune to Waltzing Matilda, so much so that she even taught one of their pet birds to whistle it along with her. 
So as a little reminder of my Nan Gay I made a custom Canvas for my Nan Pooh. 

So sorry about the crappy 'Instragram' copy. I forgot to take one on my real camera before giving it to Nan. 
After the jump I will Take you through how I did it. 

Monday 7 May 2012

Hoot Hoot - It's a Wrap!

I few weeks ago I bought this dress from Ebay. 


I wasn't exactly sure what I wanted to do with it considering it was a size 8 and I doubt I could get a size 8 over my head these days! 


So after days of thinking and nights of surfing Pinterest, I decided to try a wrap-around dress. I didn't use a pattern and kind of just winged it. I drew around a size 2 dress of Isabels, and modified it a little to have a wrap around shape. 

I cut the front 2 sides almost identical, except one side was longer than the other. 

I made the lining by cutting out a rectangle big enough to cover the whole dress, then I sewed right sides together, trimmed then zigzagged the rest.  Turned it the right way and did a top stitch along the bottom to look like a hem. 

This is the end result!


Pretty cute huh?!? 

Next time I will draw up a real pattern, so I can measure it all up correctly. One arm hole is smaller than the other, and it doesn't fit Isabel. At all. It is about a size 0-1 if I had to guess. But all you can do is try right? 


Saturday 28 April 2012

KCWC Day One

For day 1 of KCWC I decided to finish a project for Charlotte - Fabric Painting.

This is what my project started as.. A DIY disaster!

And this is how it finished! A nice heart painted singlet top!
The paint cracked a bit, so it looks a little rustic, but I like it. I can not wait to get pictures of baby Charlotte in all these clothes. 


Mumma Missed Out

This week is KCWC or Kids Clothing Week Challenge. Pop on over here to have a squiz. Some amazing talent to Ooh and Aah over!

I signed myself up for the challenge on Sunday night. On Monday I managed to complete day 1. A gorgeous heart printed top.

But on the second night, disaster struck. My little girl got sick. So sick that she wouldn't let me leave her side, and we ended up sleeping on the lounge together.
Along with that, my charger for the laptop broke, so I couldn't even blog about day 1. I was so bummed!

Little Miss Isabel is on the mend now, she had a case of Roseola. So nothing serious thankfully.

I am hoping to do a small tutorial on RIT dye and also my step-by-step process of painting the shirt I finished for day one of KCWC.

See you all soon!


Sunday 22 April 2012

Dye-ving right in!

Like I mentioned in my last post, I was planning on trying out some RIT dye. And I did!


Yesterday Isabel and I ventured to City Mission and bought an awesome stainless steel pot, 2 wooden spoons, a little plastic bowl and some nice white/light goodies! Total of all this awesomeness?? $15!! Yup, thats right, fifteen whole dollars. 

Friday 20 April 2012

Time for a Makeover!

Tonight I have read a few blog posts on dying, mainly with RIT dye. 


My 2 favourite posts were THIS ONE and THIS ONE!

Those 2 are very informative and helpful. If you follow a lot of the links you will come across some great tips and some even better tutorials!

So, all this reading has left me inspired. Tomorrow I have decided to head to our local City Mission (which happens to be right around the corner from my house), and pick up and nice large pot, an old wooden spoon, and maybe a couple of pieces of white/light clothes. 
Then after that we will be off to Spotlight! RIT dye here we come! 

I will be trying to stove top method first, because its whats recommended. I have never dyed anything in my life (well apart from some tie dyeing in school), so I want to do it the proper way for a few times, then adventure on from there!

I will be sure to take loads of pictures of before and after the transformation! I can not wait!


Thursday 19 April 2012

Twirly Girls


I found a very simple and easy tutorial a few days ago. It was so simple that I wondered why I hadn't thought of it myself! And here it is!


 I wanted to make a newborn skirt, so i followed the link to get the tutorial, but followed the measurements from the first page.

Tuesday 17 April 2012

Crafty Goodness..

The last few days I have been crafting up a storm! Making skirts, refashioning old clothes and trying to think of new ways to recycle my bag of clothes that were destined for vinnies..

Updates on these adventures will be coming your way soon. I am dying to blog about it!


Saturday 14 April 2012

Some Snoopy Love

Lately I have been op-shopping! A few weeks ago I went to my local city mission store and found this!


It cost me a whole $2.50. So cute! All I had to do was cut, sew and stuff. He is adorable. And as you can see, Miss Imogen loves him!


The things you find. One (wo)mans trash is another, (wo)mans treasure.


Friday 13 April 2012

From Drab to Fab!

So the other day I gave you a little preview of a gorgeous little dress I had made. Remember? Well I didn't make the whole dress! It did start out as a onesie.

I mentioned that I would possibly write out a tutorial, and guess what?!? Tonight is the night I do it!

I looked at plenty of tutorials on how to make one of these, and I didn’t really like the look of the end product. For some reason the onesie seemed to look all stretched and out of shape. If you have already made this tutorial, or one very similar, I’m sorry, but I honestly made this up as I went along. 

So here we go – This is a little preview of what you are about to create. Isn’t it the cutest?!

Monday 9 April 2012

Oh So Soft!

As a mother of 2 little girls, I have Barbies and Babies all over the house. These dolls all come along with hair.. LOTS of hair
Kids being kids mean that they don't realise they need to look after the dolls hair to keep them looking nice, so this is where I come in. 

Keep reading if you want the trick to getting barbies hair nice and smooth again!

Sunday 8 April 2012

Merry Easter Everyone!


I hope everybody has a great day. Enjoy your little ones and don't eat too much chocolate.. Who am I kidding?!? PIG OUT! ;)


First try - first success!

Last night I attempted a baby onesie dress for the first time. After reading plenty of blogs with tutorials and not really liking how they turned out, I tried my own pattern. This is the result:


I absolutely LOVE it! 


This is another piece to add to my Project Charlotte. The stash is getting rather big now! This is my favourite though ;)


I took photos almost every step of the way. So maybe a tutorial will be posted?


Friday 6 April 2012

5 Minute Baby Headband Tutorial

I love to see little baby girls in gorgeous headbands. It adds 100 points to their cuteness level! So, I have made 2 (so far) for my niece-on-the-way. This is how I did it!


Wrapped in Yarn

Last night I attempted a yarn wrapped letter. I think it turned out perfectly! Exactly how I wanted..


What do you think?

I chose the letter 'C' because my Sister in Law is having a girl in April. Her name is going to begin with C :)

I found the tutorial for this HERE. It may seem silly using a tutorial just to wrap a letter in yarn, but believe me, you WILL need it! I struggled with the tutorial. The ends of the letters are the hardest, as the yarn keeps slipping off which means you have to start all over again. 
Go on, have a go! Be creative. The rewards are amazing. 

I am still doing my big project of the vinnies dress. Its taking a lot longer than I originally hoped as it is really hard to find the time lately. 

Hope to be back with some crafts later!

Zoe
xx

Saturday 31 March 2012

Out with the Seam Rippers!

Yesterday I went on a little excursion to the Vinnies close to Imogens school. I found this little (big) beauty!


I have big plans for this! Keep watching this space!

Zoe
xx

Refashion-ista!

A while ago I was feeling a bit glum about my sewing experiences, so I went searching for some inspiration. 
This is what I found - New Dress a Day!
Marisa takes old, worn out dresses and makes them wearable and fashionable again. So I took a leaf out of her book and had a go myself!


I was so excited to get started I forgot to get a 'before' picture. So this is how it went. I bought a womens size 10 'Miss Shop' dress from the Salvation army. Its only cost me $1! The dress is black and white checkered, spaghetti straps and it had an awful ruffle around the bottom. Also it buttons down the front. 


The first thing I did was seam rip the ruffles off, and man oh man did that take a long time! Then I hemmed the bottom (removing 2-3 buttons). I had to take the straps in at the back because it is for my 5 year old daughter, so it needed to be small. 


I put the dress on her inside-out, then I was able to pin the sides so I knew where to sew and cut. 
It was quite dull and boring for a 5 year old to wear, so I wanted to add colour. I added a blue flower with a button center, but it looked terrible. Kind of like those ribbons you win for coming first in something. So I took that off, and replaced it with a mixture of bright pink buttons. Now it's perfect!


Left is the bad, bad flower.. Right is with the pretty buttons. This is only a crappy iPhone shot. Will do a proper SLR shot when Miss Imogen gets home tomorrow.


Zoe
xx

Monday 26 March 2012

Cute Little Ruffle Bum

My Sister-in-Law is currently pregnant and due in July (eeep!). So because I am the best SIL, I have decided to make her a heap of home made goodies, instead of buying it all. Heaps of cute goodies at a fraction of the price, and lots of love built into them.


I haven't made a lot so far, as I am finding it hard to get time. My youngest is really having a hard time sleeping, as she is having night terrors. So mumma is getting sleep where she can right now!


But this was my latest project. I turned a boring old onesie into something fun and cute!!


I added a little decoration around the collar for a little flare.


I think the collar looks adorable. 


Ruffle bum!


I didn't hem the ruffles, left it a little messy. I like it this way. 


To make the ruffles, I chose my fabric and cut it 2.5 - 3 times the width of the onesie and 1.5-2" wide. I put it through my sewing machine on the longest stitch that my machine does. Once it went all the way through, I grabbed a piece of string from the end and pulled it to make the ruffles. Once you are happy with your ruffles, pin them onto the onesie, in any location. Then you just sew over the middle gather line. Afterwards I pulled out my original gather line so the onesie had more stretch in it.
For the sides, I tried to sew the edges of the ruffles as close as I could to the seam. Just for a nice finished look and make them stay on a little better.
If you would prefer a neater look, you could always give the lengths of material a small hem before ruffling them. I really like the frayed look though.


For the front I did hem the piece of material I wanted. I then pinned it around the collar of the onesie, making sure every cm was a pleat. I covered the messy end with a pretty bow.


Next project will have step-by-step photos and instruction on how to made it.


This is so cute! Can't wait for Miss C to come along so she can wear it!


Zoe
xx

Thursday 22 March 2012

My Camera Lost it's Cord!

Within the last few weeks (months) I have been lugging my camera around here, there and everywhere. As one usually does with a camera. And along with that I have been taking my charger too. 

Somewhere along the way I have managed to lose my charger and now my camera is flat..    F-L-A-T.. Flat as a tack - Well, I think you get the picture. 

So tomorrow I am doing a MEGA hunt for it, and if that doesn't work, the husband has been ordered to find a replacement. 

So by tomorrow night I will have a nice new post, with my current project. 
Project Charlotte.

Catch'ya all tomorrow

Zoe
xx

As Cute as a Button

These here are adorable, and the perfect accessory for a childs room. Be it a boy or a girl.
Button Monograms. 

I found some inspiration from Pinterest this post in-particular.

So I went down to my local City Mission and found some old canvas prints ($1.50 each), then i bought them home and re-covered them with old clothes of mine. I used a hot glue gun to stick them down, but a staple gun would work a lot better (I am off to buy one today). I already had buttons that I bought in bulk from my local Chickenfeed store, which is just our cheap store. Kind of like the reject shop.

I used word, then chose my favourite font and wrote in the letter of choice. I made the font 700 and traced it straight from the computer to a piece of paper as my printer is broken, but printing would be ideal. I traced around my letter onto the fabric with a fabric pencil and set out how I wanted my buttons. 

Gluing them on was the most trying thing I had done in a long time. I hot glued them on, which consisted of lots of burnt fingers and stringy glue EVERYWHERE. If you line up how you want the buttons first, you should be able to just pick a button up and glue it back to the same spot without much rearranging. 

Even if its a little frustrating at first, the end product is really rewarding. And the kids love it!

Good Luck ♥
I is for Imogen
B is for Bridget 

Zoe
xx

Wednesday 21 March 2012

Hoot!

So if you have been reading along with my blog, you would have seen my very first attempt of an owl. Here is a refresher

Pretty terrible right?!?

So a couple of weeks ago, I decided to pull out my machine and give owls another go. I love owls, and i especially love owl toys! Here are the results
The one above was my first go! In love!! Fat quarter front, with Minky back, eyes and beak. 

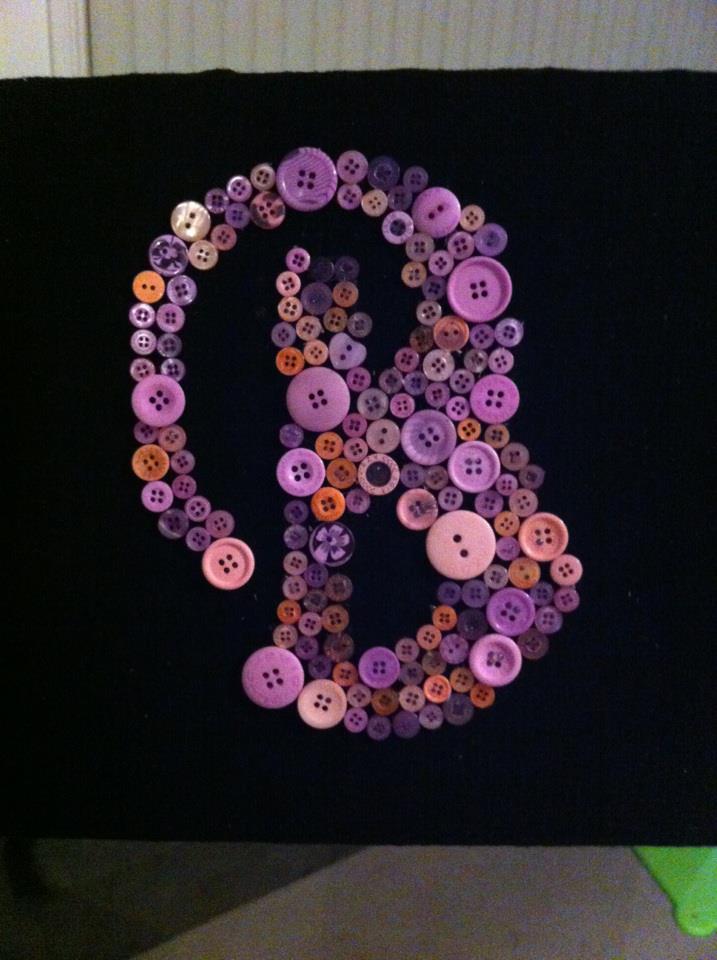
 The next 2 were made for a friend. The blue one is for her baby (due very soon) and the purple one is for her friends baby. I added letters to the minky back.. I will add a photo of the girls one, as the boy name is a secret for a while yet :)

This is the back of the girls one. I think it turned out pretty well for my second try! Zig zag stitch was very kind to me. 
This little guy was made for the same friend, but he is mini version. He has little taggies for bub to pull on. In my experience, babies LOVE tags!

These owls are 100% my own pattern. 

Zoe
xx